
Oaks Theater Work In Progress - Reduction Process
The process of reduction lino printmaking is one that takes a lot of pre-planning as well as time for carving and printing. The reduction process is one that requires a lot of patience since you must wait for each layer of ink to dry before printing the next layer.
This particular print took me over 17 hours of drawing, carving, ink mixing and printing, but the actual time to completion took about 9 weeks.

- Step 1 -
Concept, Design and Preparations

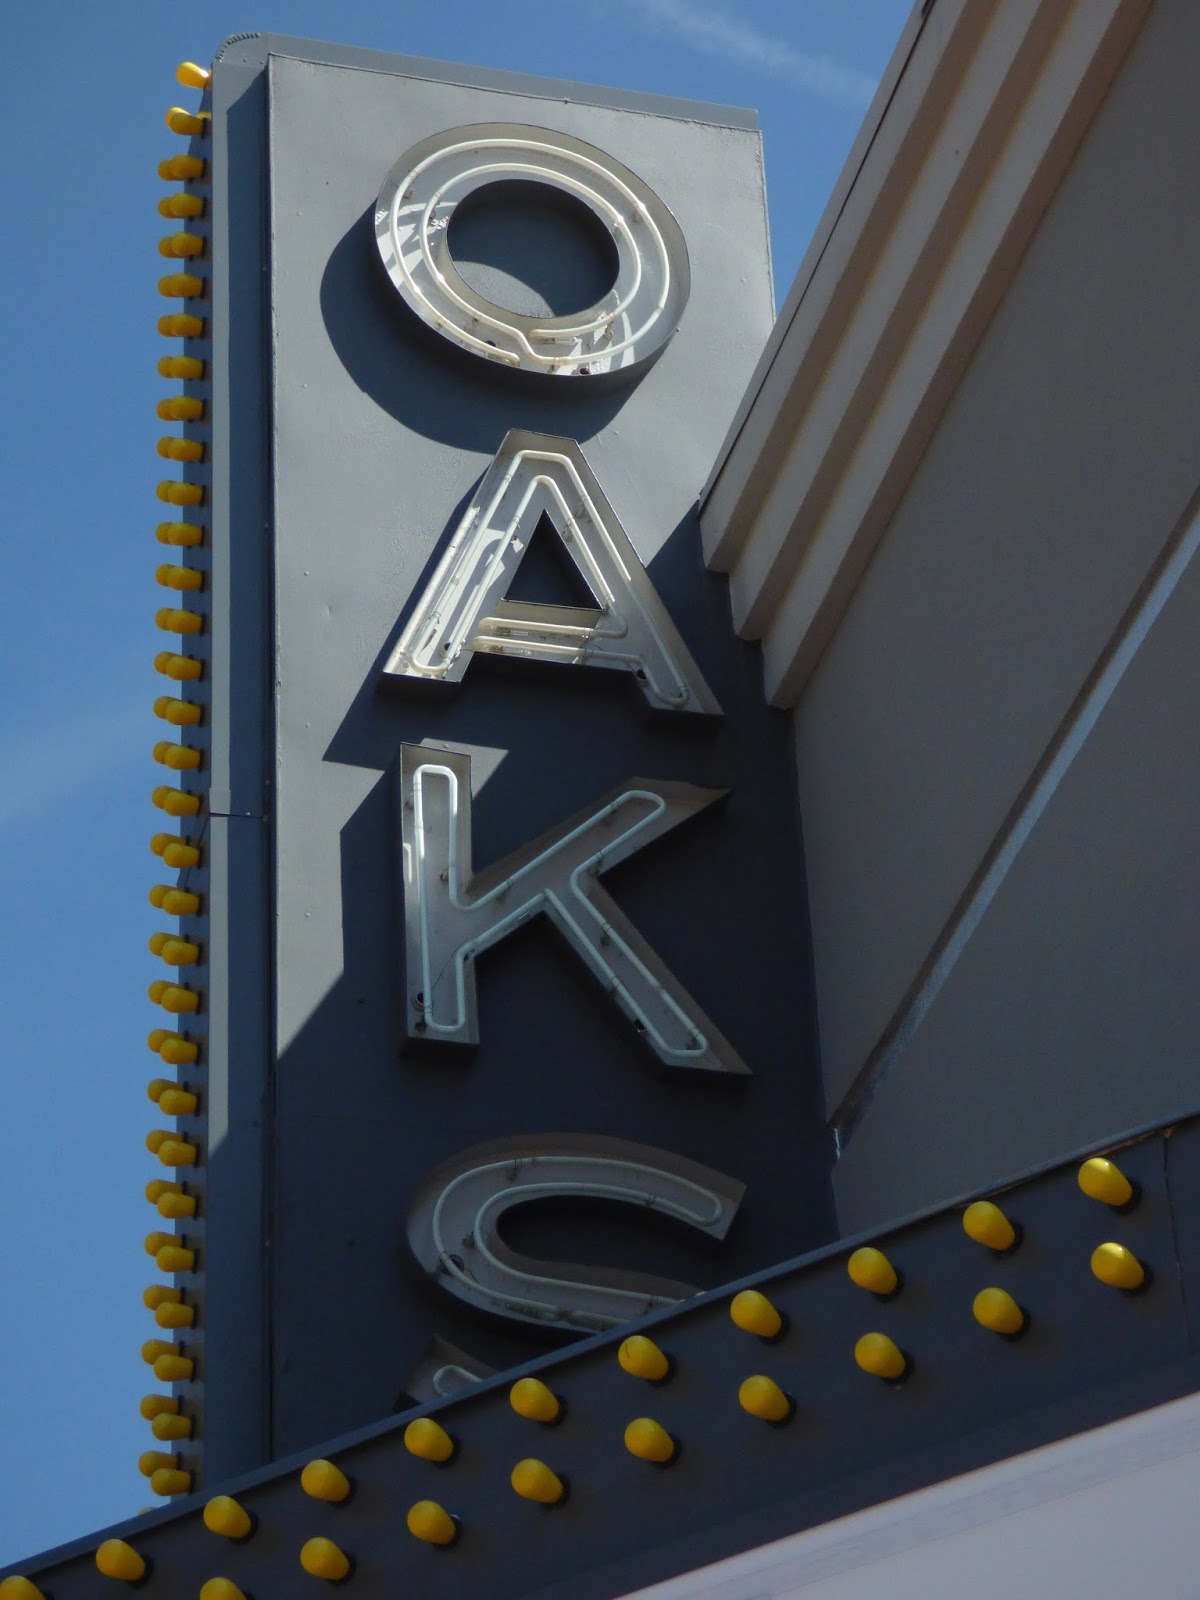
The first step of this process is finding a suitable subject matter. I had heard of the Oaks Theater which is located in Oakmont, PA (a Pittsburgh suburb of sorts). I went fairly early in the morning because I wanted to have suitable shadows on the sign. After sorting through the images back at home, I alter the image to fit on the appropriate sized lino block I'm using.
The next step is tracing the image using a soft lead pencil. In this case, I'm using a 4B pencil. Once the image is completely traced I will place the tracing paper (image down) on my linoleum block and run it through my etching press. The pressure will transfer the pencil lines onto my block.
- Step 2 -
Transfer
Transfer


Step 2 is to transfer the completely traced image onto the linoleum block. I double check the tracing for anything that may look inconsistent and make small changes that I feel may help with the final image. I don't normally color in my shadows, but in this case I decided to identify where the metal housing for the letters was so I wouldn't later confuse them with the cast shadows. I want to have as much information correct before the transfer so that I'm not trying to fix things later on.
Once I'm happy with the final tracing I place the tracing face down on top of the linoleum block and run them through my small etching press. The pressure cause the 4B graphite to transfer from the drawing to the block.
The top image shows all 3 pieces - the original printed photo that I had taken, the tracing and the final transfer. The second photo is a closer detail of the tracing and transfer.
- Step 3 -
Inking

The next step is to trace the entire transferred graphite drawing in a permanent, waterproof marker. I've found that the Sharpie Twin Tip Marker is perfect for this process. It gives the options for both a fine and ultra fine tips. I use the ultra fine tip to trace all the lines and if there is anything that requires filling in then the fine tip comes in handy at that point.
The image above shows the beginning stages of inking. I have to be very careful where my hand sits as the graphite will rub off easily. I usually try to keep to the outside edges first before venturing into the center. Once the areas around the edges are complete then I don't need to worry about smudging them with my hand.

Detail shot of some inked areas next to graphite areas.


At this point the inking stage has been completed. I've completely traced all graphite lines in Sharpie marker and I will lightly run a vinyl eraser gently over the surface to clean up any of the graphite.
After making sure that the block is clean I will start to carve away the surface using Speedball lino cutting tools.
Detail of the letters. I added in small black dots to identify where the pegs are that hold the neon tubing away from the surface.
- Step 4 -
Carving

When I start carving a project like this I always know exactly where my colors are. I use the papers color of Bright White as all of the white areas in the image. In this projects case the part of the marquee that identifies what is showing is all white.


This is a detail of how I work my way around the letters. I use a very fine lino cutter blade and slowly and carefully carve around the letters and other areas that are not supposed to be white.


As shown in the pictures above, the block is constantly carved away after each color is printed. Once I've printed a color and start carving there is no going back. It's both terrifying and exciting all at once and requires that you get the results you were looking for before carving.
- Step 5 -
Inking


Above is the final print. I did hit some speed bumps along the way that caused this piece to probably take longer than it should have, but overall I am very happy with the end result.
Thanks for taking the time to look over this Work-In-Progress and I hope it gives you a somewhat better understanding of how it works and the amount of time and effort it takes to create just a single 8x10 linocut reduction print.
No comments:
Post a Comment