Thursday, July 30, 2015

Oaks Theater Update - 1st layer printed!!


Finally got the first layer printed!  This image is slightly bluer than it acutally is.  The regular color is light gray on a bright white paper.  Cannot wait for this layer to dry so that I can print the next layer.

While waiting for it to dry I will now carve away all the areas that are light gray (the color just printed)

Monday, July 27, 2015

Neon "B" - 8x8 - Reduction Print update #2


Printed the first color today of my Neon "B" today.  I was hesitant to print this since it was my first time printing unmounted lino on my home press and wasn't sure how well it was gonna work out.

Seems to have worked out pretty well though.  I printed a total of 10 and plan on an edition of 8 or 9 with 1 or 2 as Artist Proofs.  Taking a couple days away and when I get back I'll start the carving for the next color.

Saturday, July 25, 2015

Neon "B" - 8x8 - Reduction Print


Test print for my neon "B" - 8x8

I've yet to print unmounted linoleum on my etching press and recently made up a registration jig for unmounted and ran a test print today.  I used blue because it's easier to see and I wanted to see whether the pressure I had it set at would create a good solid layer of color.

The pressure is pretty close, but not quite there.  The far left edge of the image is the tone that I'm looking for.  It's lightens a good bit in the middle and the right edge wasn't underneath my plexi so it didn't print hardly at all (due to lack of pressure).

It's a good starting point for working with unmounted lino.

New / Old Lilypad Project - 9x12 Reduction Print


A couple months back I did a quick 5 color Lilypad Reduction Print just to see how it worked out.  Overall it worked out pretty well with some exceptions.  I feel that the prints turned out pretty well though and have considered doing a larger print with oil based inks rather than water based.

I'm using the same image as before (see above), but this time I've enlarged it to a 9x12 rather than a 4x6 that the test was.  Below is the start of the tracing for this project.  As with all of my projects, I'm currently tracing in a 4B pencil and then will pass it through my etching press to transfer the design.


Thursday, July 23, 2015

Oaks Theater Update!!! Started carving!


Finally got my registration jig figured out and drilled the registration holes for both a 1 inch and a 1.5 border.  This poor Oaks Theater has been waiting to be carved for so long and now that the jig is ready I started carving away the white areas!  Woohoo!

Feel free to check out the updated Oaks Theater WIP page.

Cupcake update - Starting over the Black Screen


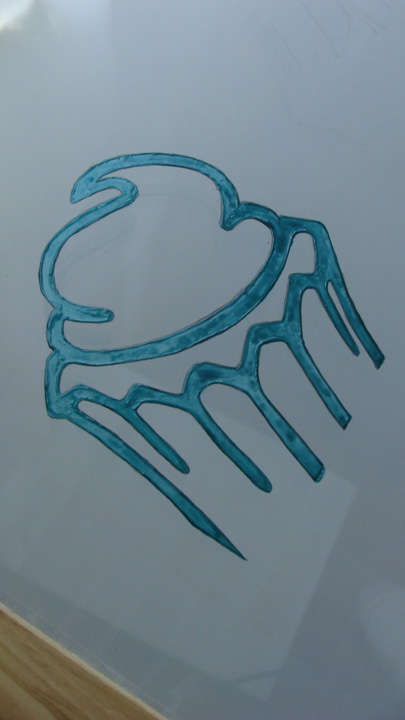
So after some issues with the way that the original screen looked I decided to start over.  On the left are my tools.....dip pen, drawing fluid and paint brush - One the right is the finished drawing fluid version of the cupcake.

I have currently filled the screen with screen filler and it is in the process of drying.  Should have it washed out soon.

UPDATE:  Right at the end of filling in the screen I accidentally dropped some screen filler into one of the washed out areas.  I tried wiping it out with lots of water and got "most" of it, but when I printed it there were marks where the ink didn't go through (see below).  Time to start over.


2ND UPDATE:  This project is starting to wear me down.  I filled the screen for a third time today and noticed while cleaning my scooper that it looked like there was drawing fluid along the edge.  Turns out that there was.  The humidity must be keeping it somewhat moist.  It was dry to the touch and not even tacky when I put the screen filler in.  After washing out the screen I have large areas of screen filler in what should be my black line areas.  I have to start again.  Washing out the screen now.  I may need to take some time away from this one until the humidity drops and then try again.


Sunday, July 19, 2015

Cupcake Update

Decided this morning that I was not completely happy with the line quality of the final screen for the black outline of the cupcake screenprint.  I am currently washing out that screen and I'm on vacation from work for almost 2 weeks so I should be able to really get things rolling.

Saturday, July 11, 2015

Production and Work In Progress


This is a picture of my ink well and my Amur Tiger linoblock from my printing session the other day.  I printed 17 prints and they are currently hanging and I'm waiting for them to dry.


In the last two days I've also progressed on two other projects.  The Heinz Field sing in mostly traced, but there are some tiny areas that require a sharp pencil and a steady hand.  Almost done here.

Worked on the color separations for my Red Panda as well tonight.  Finished the black key color and tonight worked on identifying the lightest yellow of the fur.

Tuesday, July 7, 2015

New Tiger Block test print!

Above is the new lino block the Amur Tiger that I started a while back.  I wasn't completely happy with the past print so I decided to completely re-do the entire block from scratch.  I did use the same image and was actually able to transfer the pencil tracings from the last block which helped to move things along quicker.

I'm happier with this version of the block, but still not completely sold on it's final look.  Below are the original two...the left was the original and then the re-carved version to it's right.

Definitely trying to get my art making back on track.  I have a lot of blocks to work on and now that my room is mostly back together I plan on ramping up my production.


Friday, July 3, 2015

Getting things ready again.

Got the wall fixed about a week ago and I've been rearranging a bit.  Should be back to printing within a couple days... at most.